Well the flip house is officially on the market. It took a little longer than I expected due to the tile debacle, but that is how it goes in the remodeling world. I haven’t been very good at posting updates here on the blog, but if you follow me on Instagram or Facebook, you have been able to see the progress. If you need to catch up, you can click here, and here.
I thought I would start with the entrance and living room transformation. I will do probably 3 posts total of the before and afters to keep it simple.
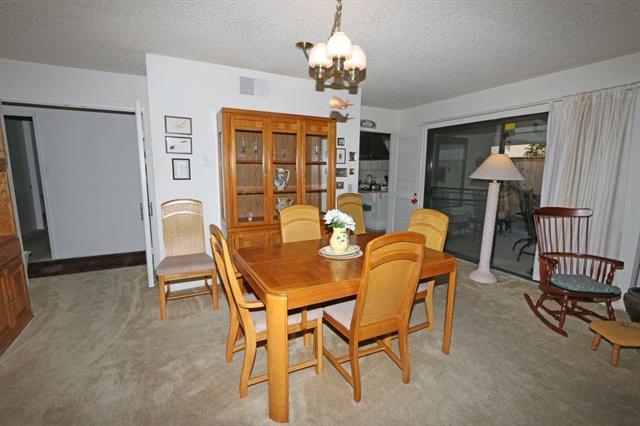
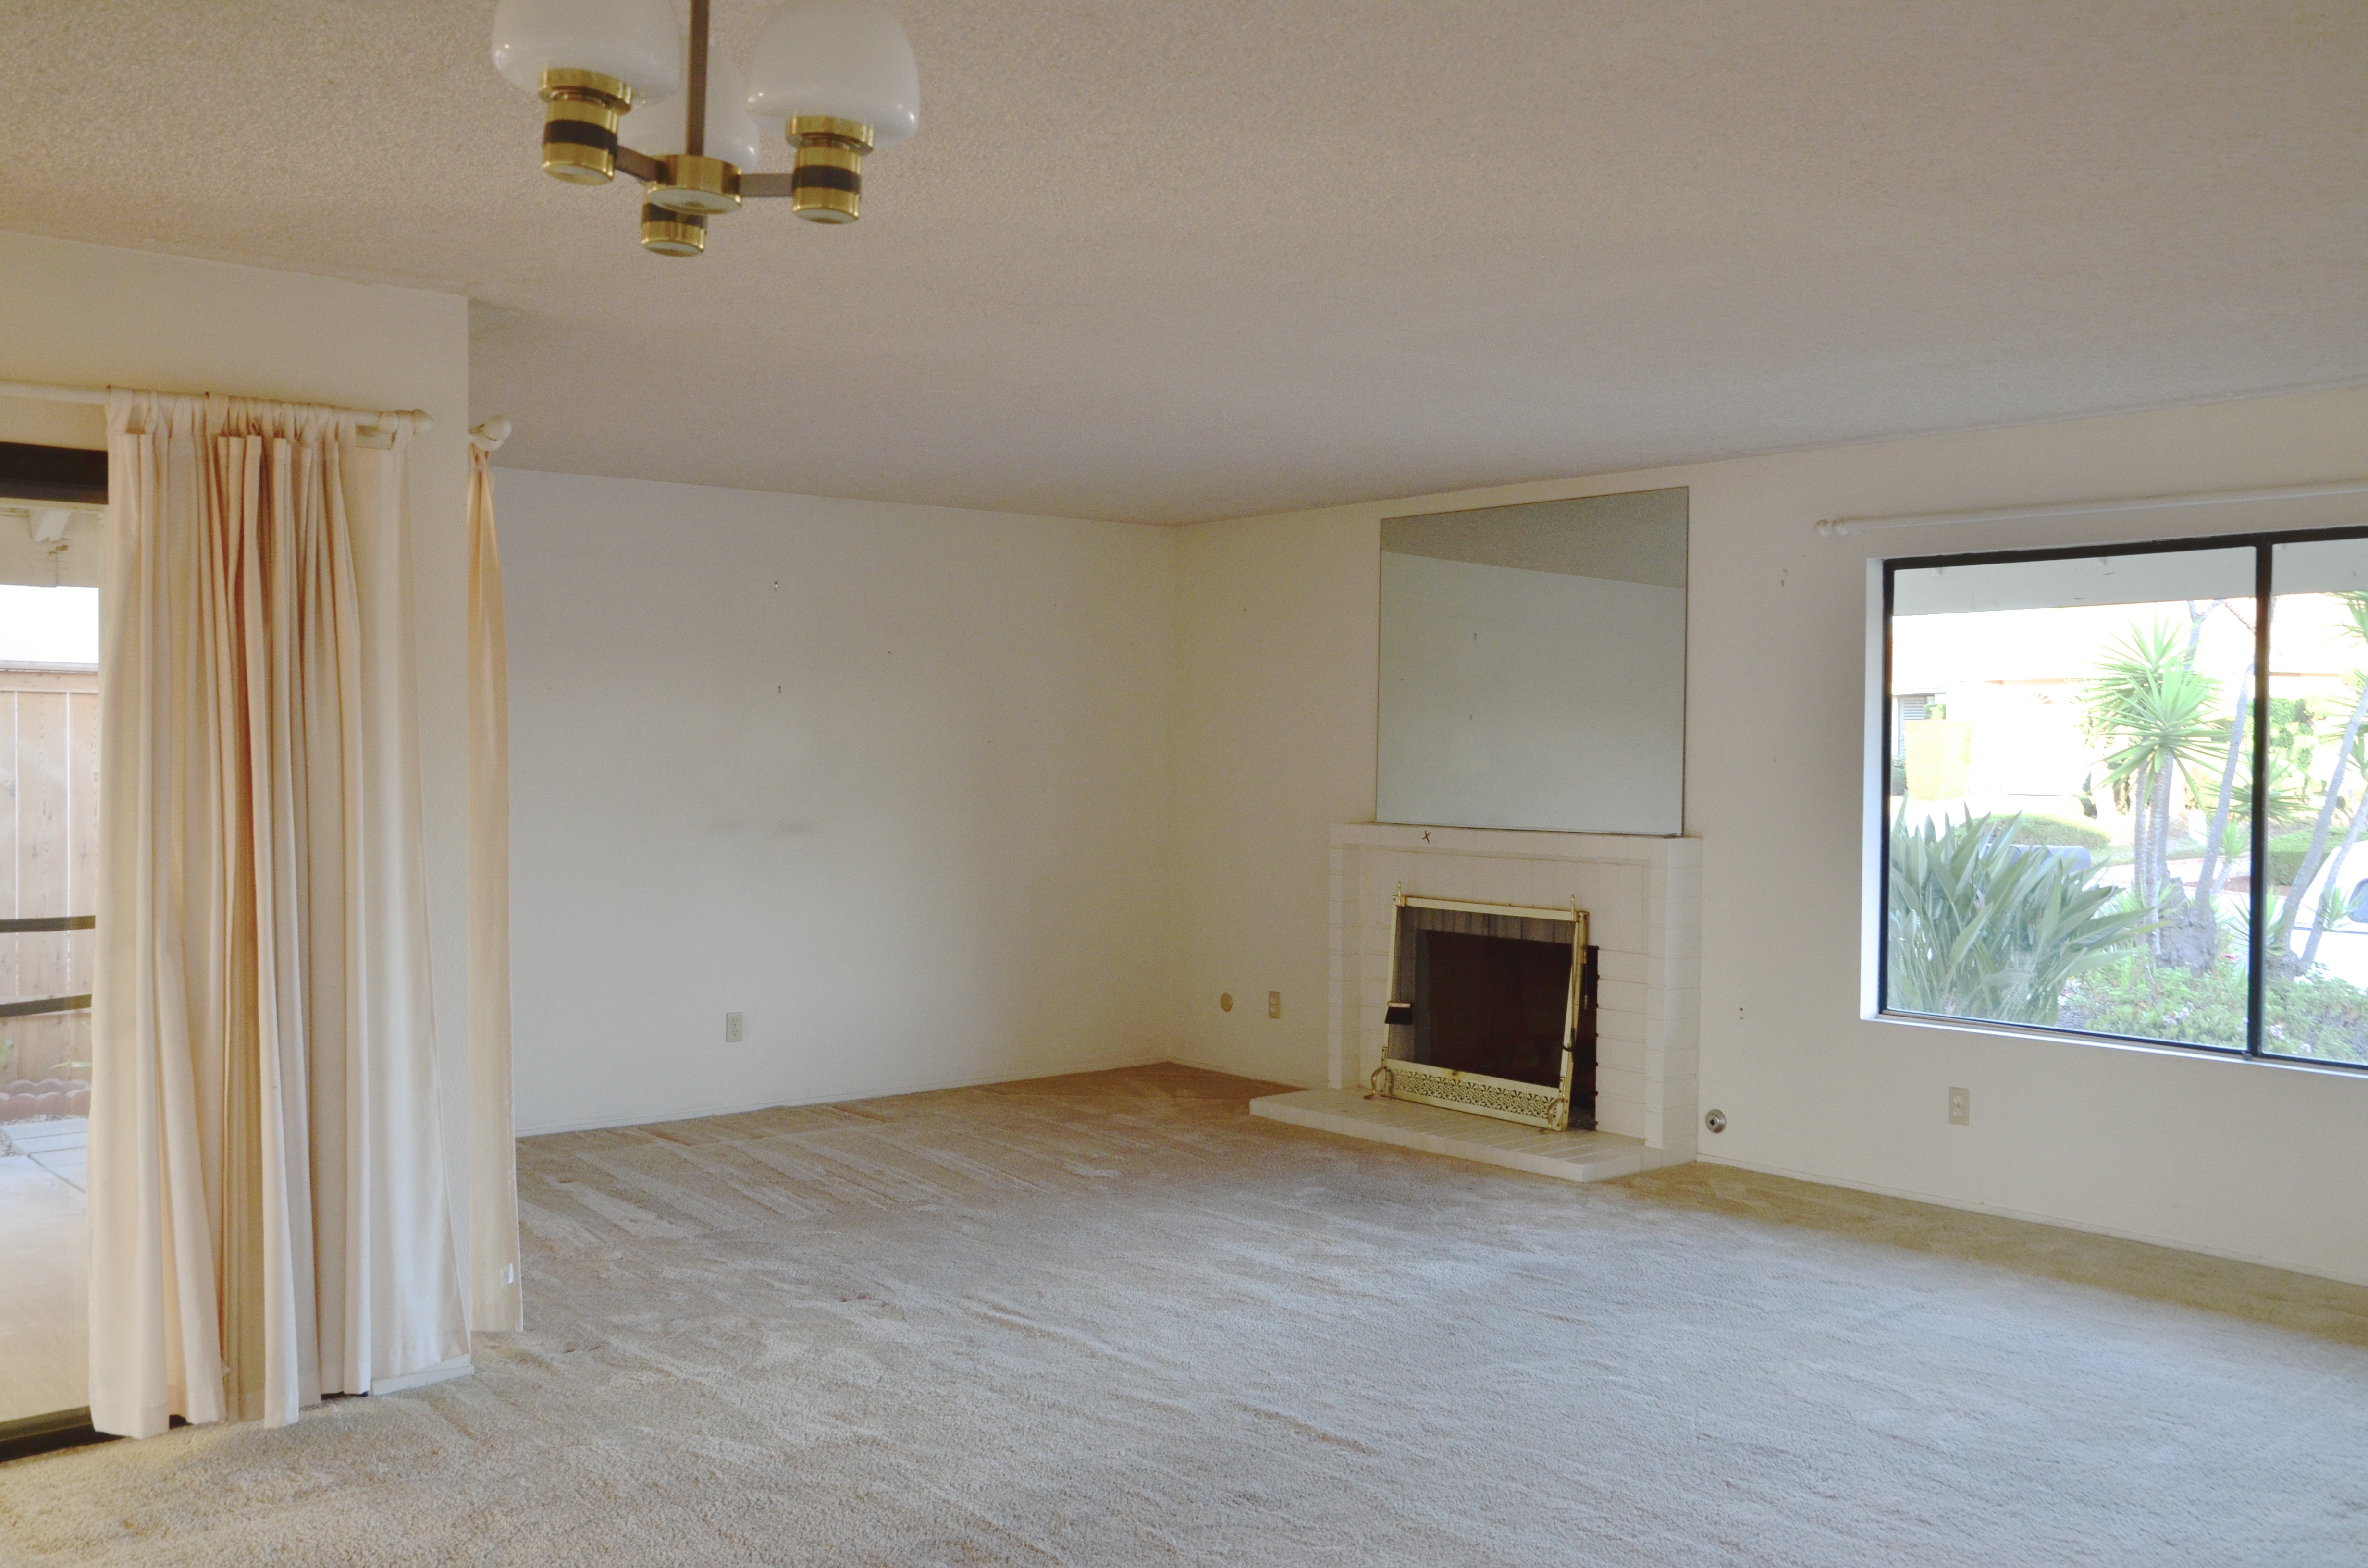
The house was built in 1977 and hadn’t had any updates. This was the view when you first walked through the front door {picture from original listing}
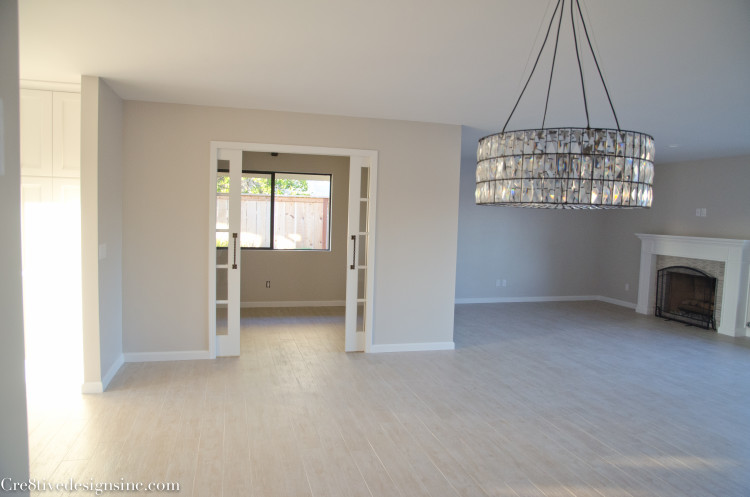
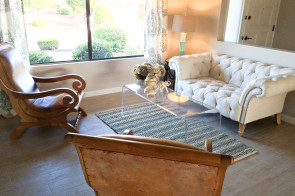
And this is how it looks now
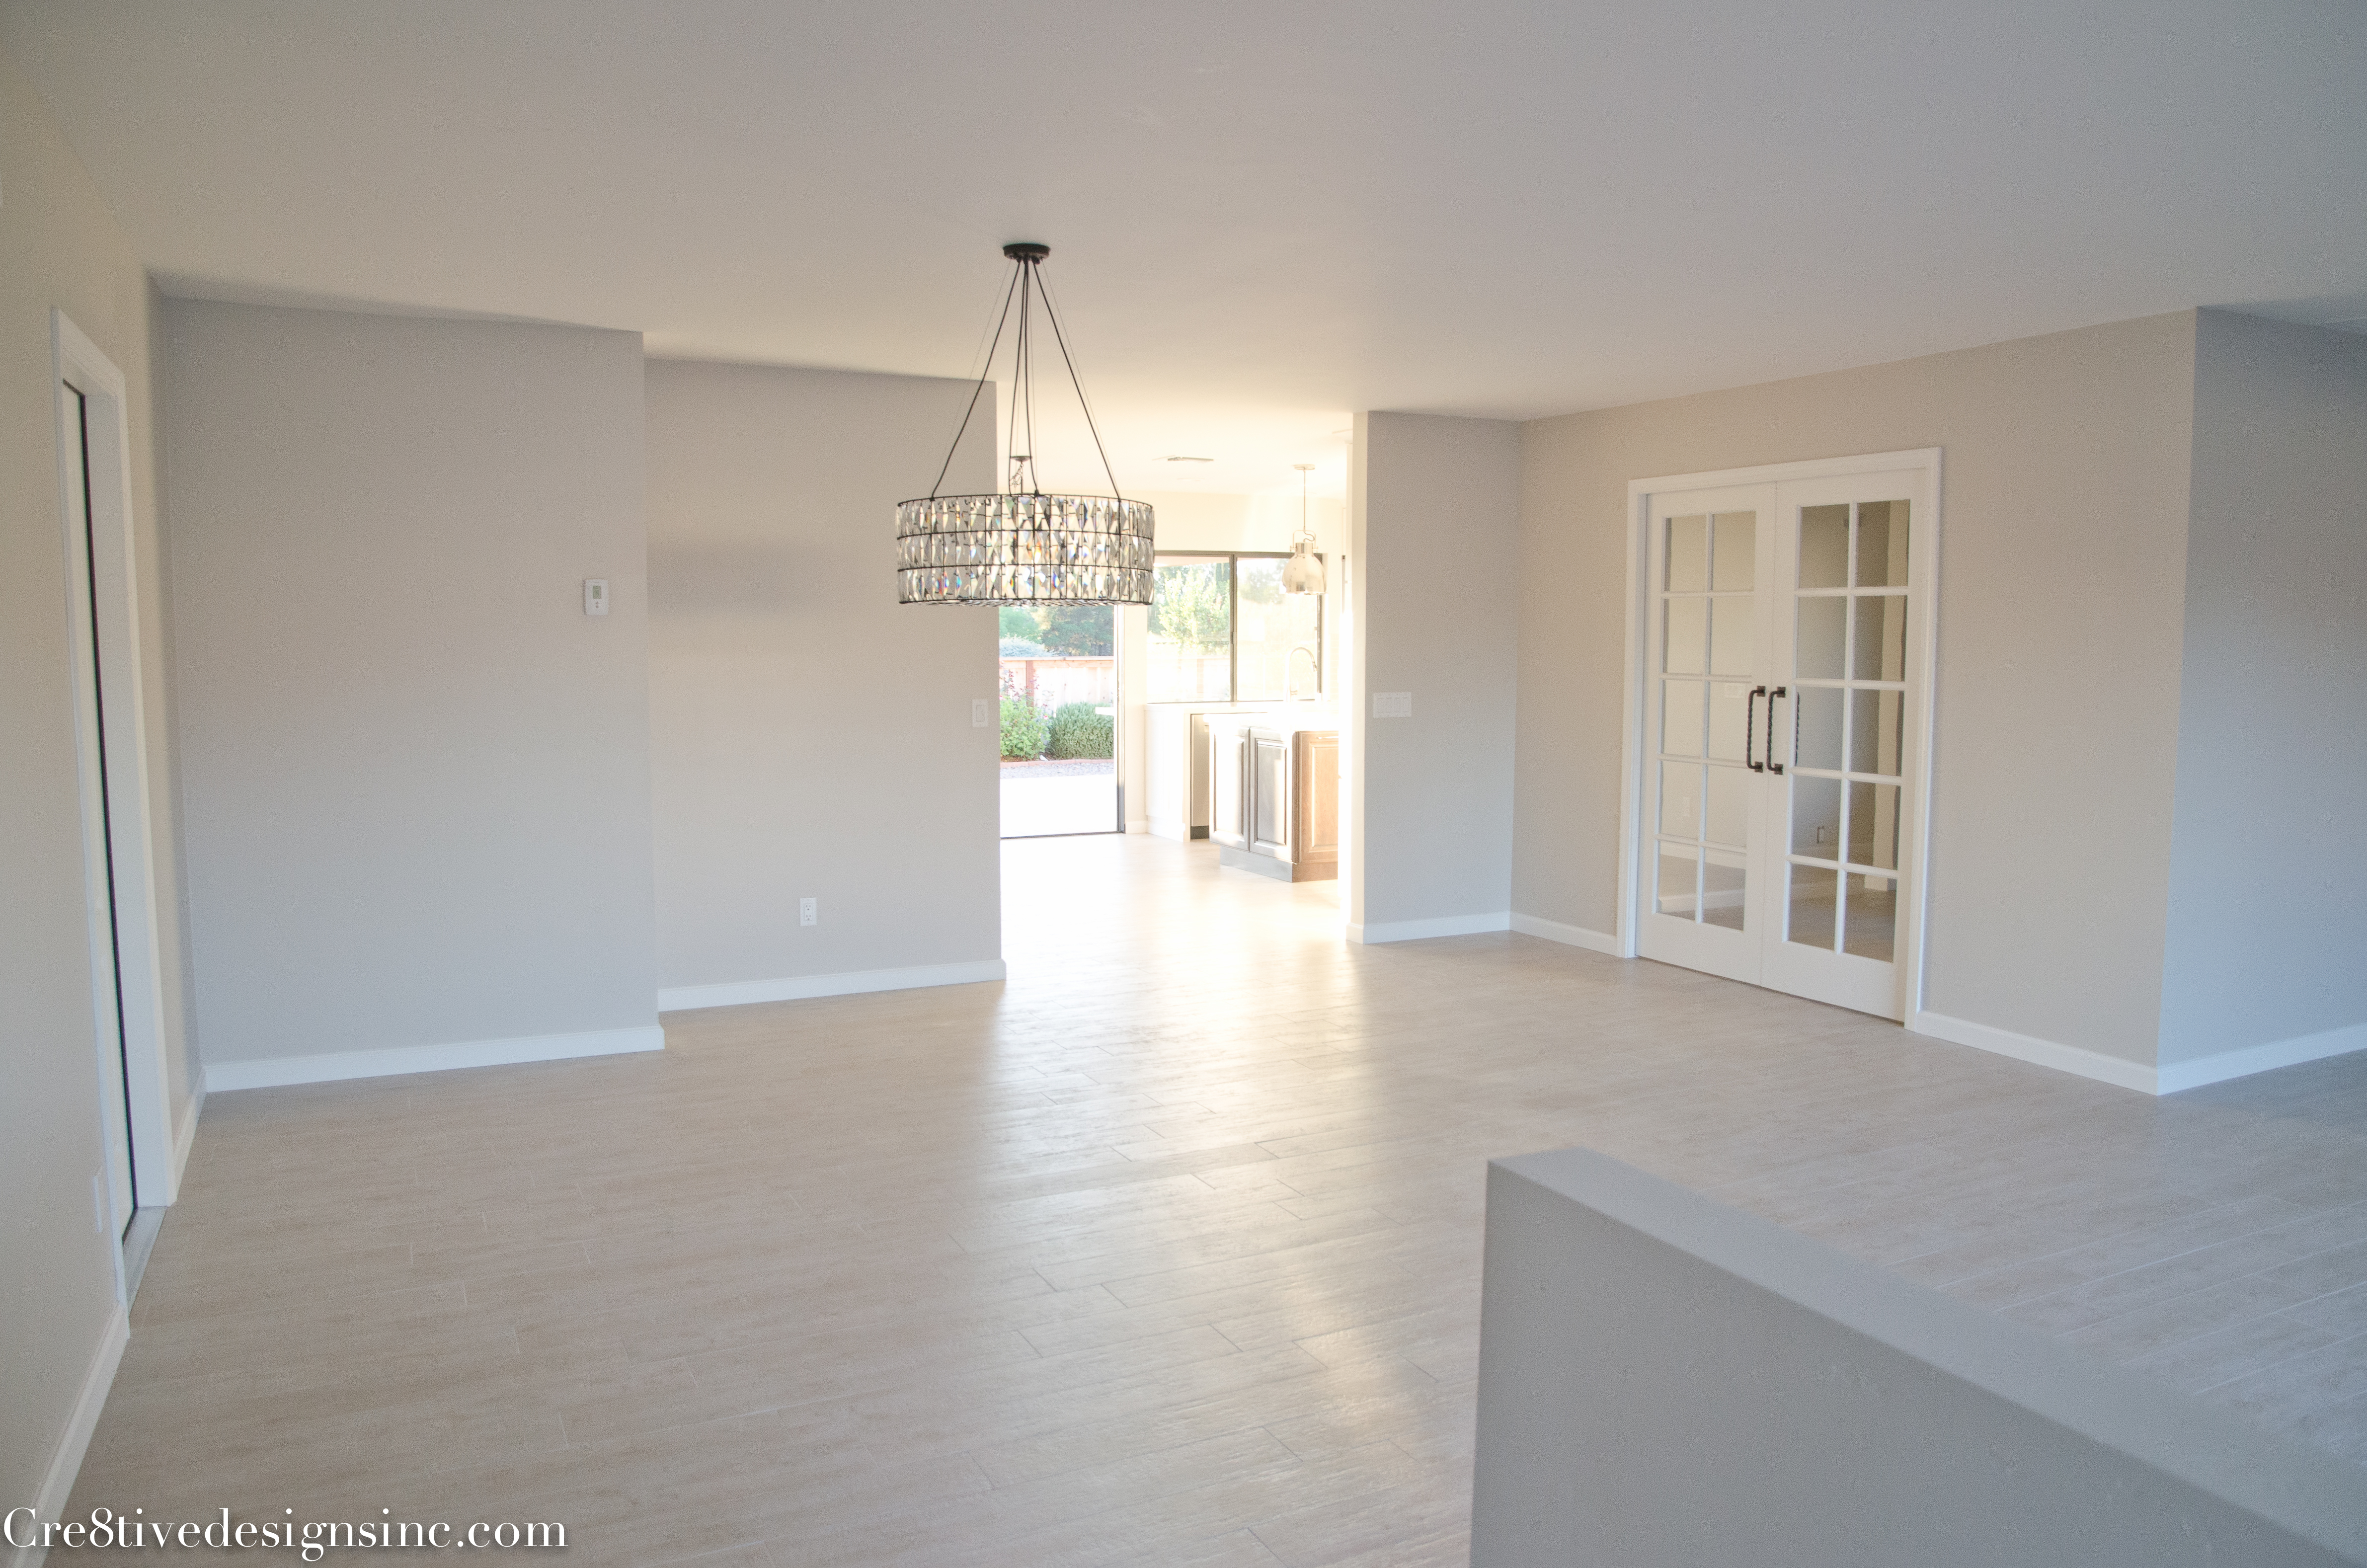
Ah, so much more open, and you can actually see the beautiful view out the backyard! Using the porcelain wood planks throughout the house makes the house flow so much better. Changing the wall configuration to only one opening so that you could see more of the kitchen made a huge difference. Like that chandelier? Me too!

It’s Pottery Barn’s Adeline Crystal Chandelier. But I saved 25% off by buying from a seller on Ebay. It was brand new, in the box and in perfect shape. I always check Ebay or Craig’s list to see if I can find a better deal on an item I am looking for, sometimes I get lucky and sometimes it’s a bust.
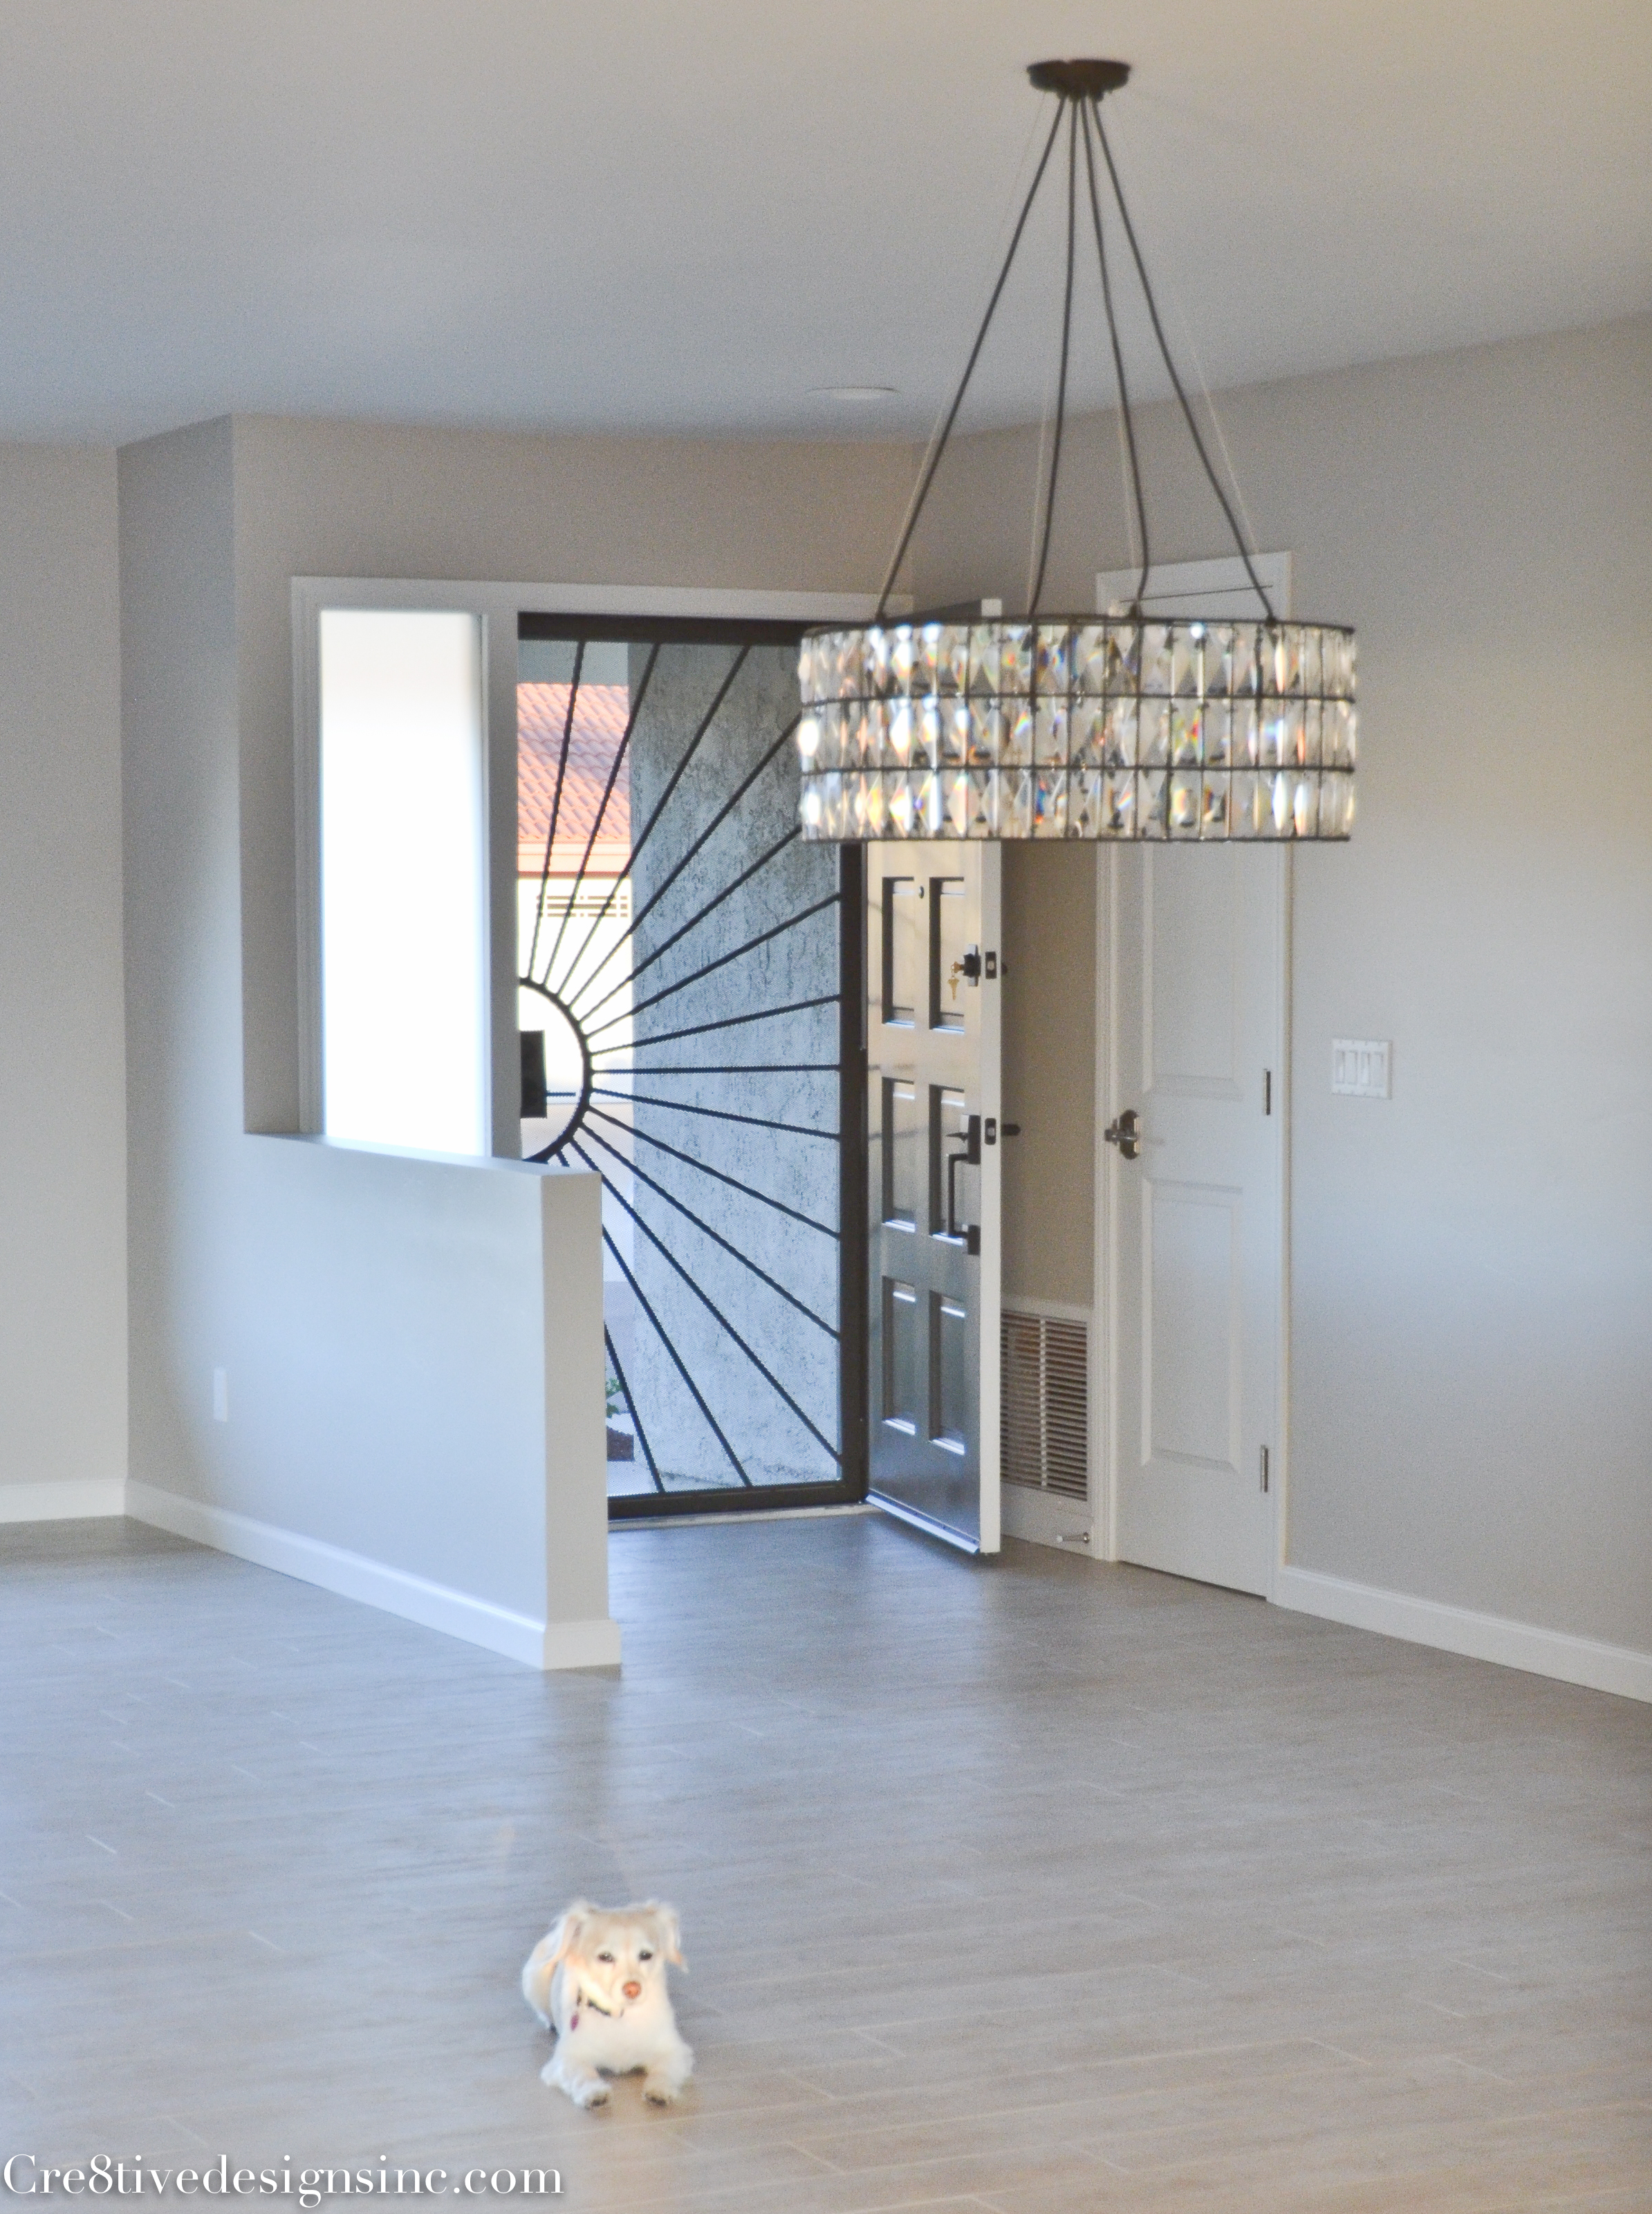
I left the pony wall in the entrance, but took down the 70″s spindles {this is the only picture I have that shows them, it’s from the listing}

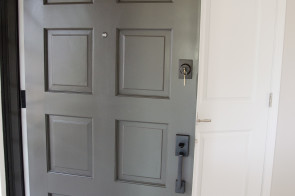
The door had decorative molding on the inset of the door panels. I didn’t have a before picture of it, so I took a picture of one in the neighborhood 🙂

The door was solid, in good shape, just had a dated look. So I took the decorative panels off and painted the door SW Urban bronze and added new door hardware

All the interior doors were replaced with slab doors from HomeDepot with new door hardware from Build.com. Slab doors are solid, have a heavy weight to them, which blocks out noise, and they don’t feel cheap when you close them. They cost a little more, about $20 a door compared to hollow core doors.
I also replaced the side light glass with a more modern frosted glass {I don’t have a before of the 70’s glass that was there} The screen door came with the house, and I think it is nice to have a screen door, so I opted to keep it and painted it the same SW Urban Bronze as the door {Daisy keeps photo bombing my pictures lol}
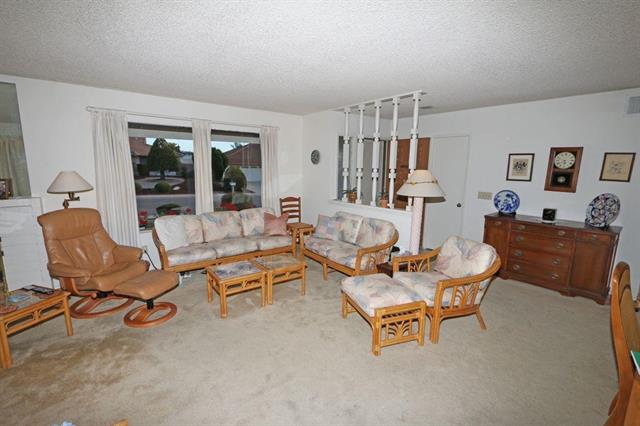
This how the living room looked before

And now after

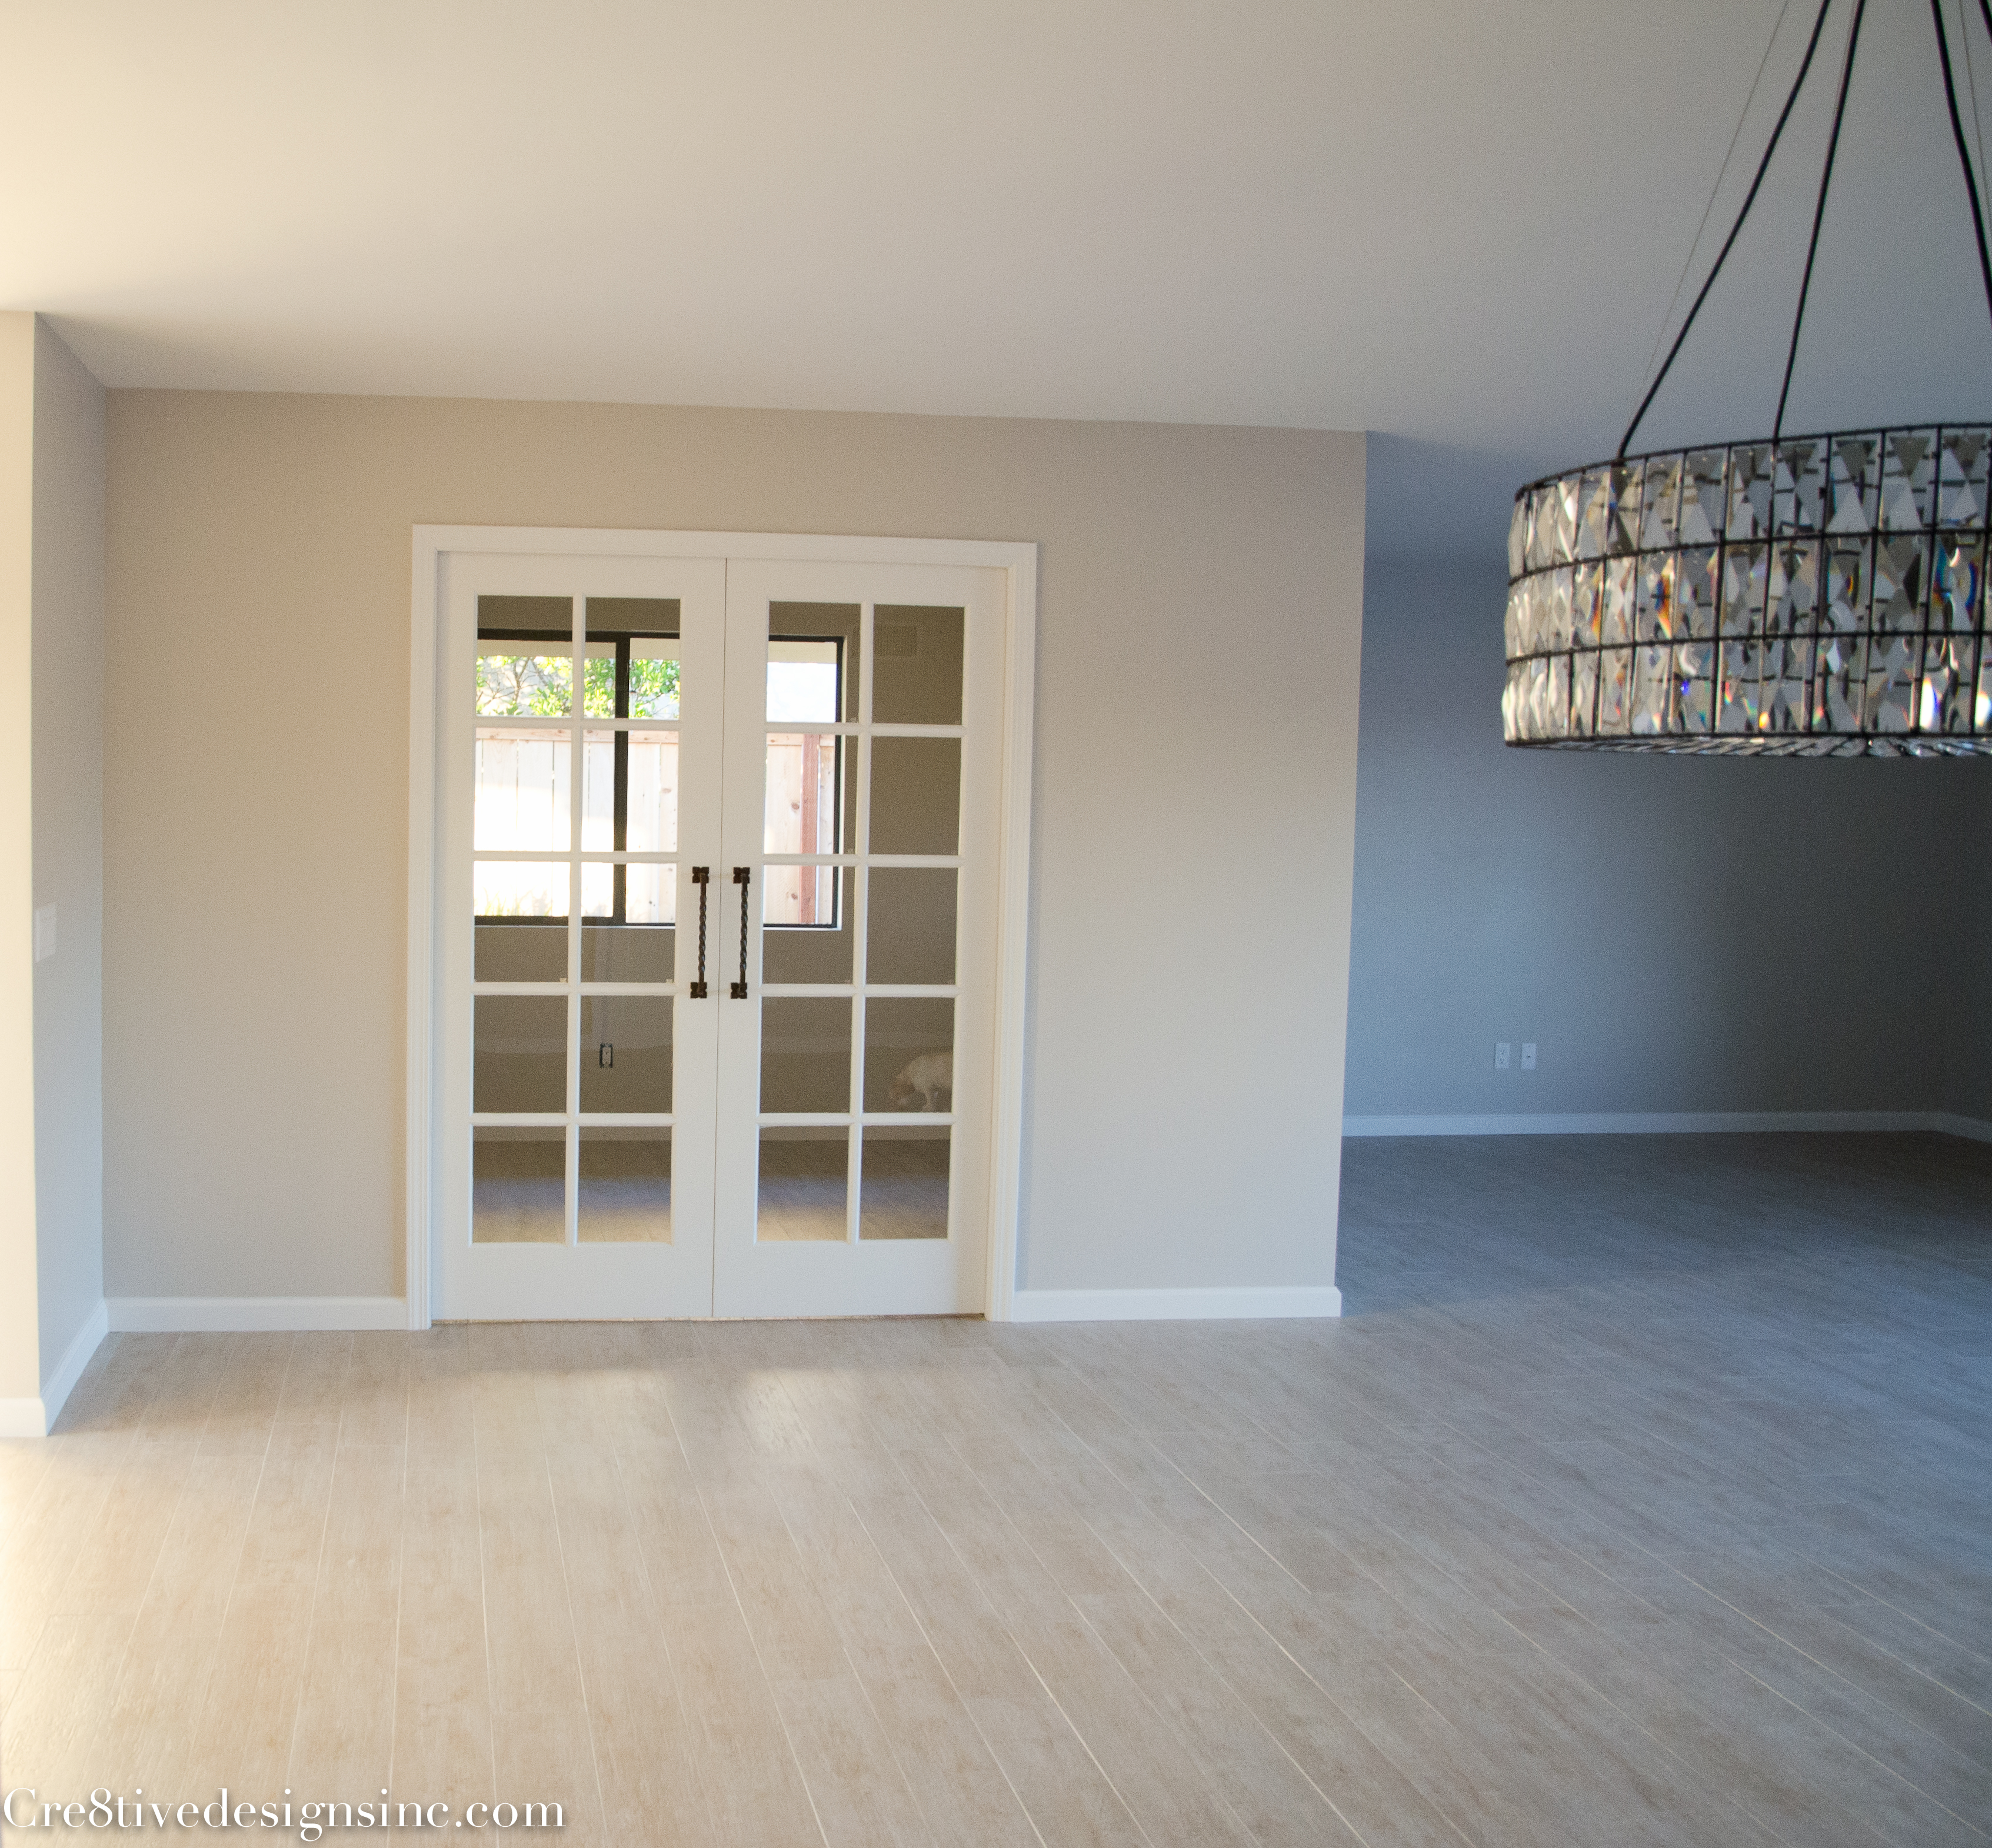
The side patio that sat in between the kitchen and living room as you can see is gone, and is now an office

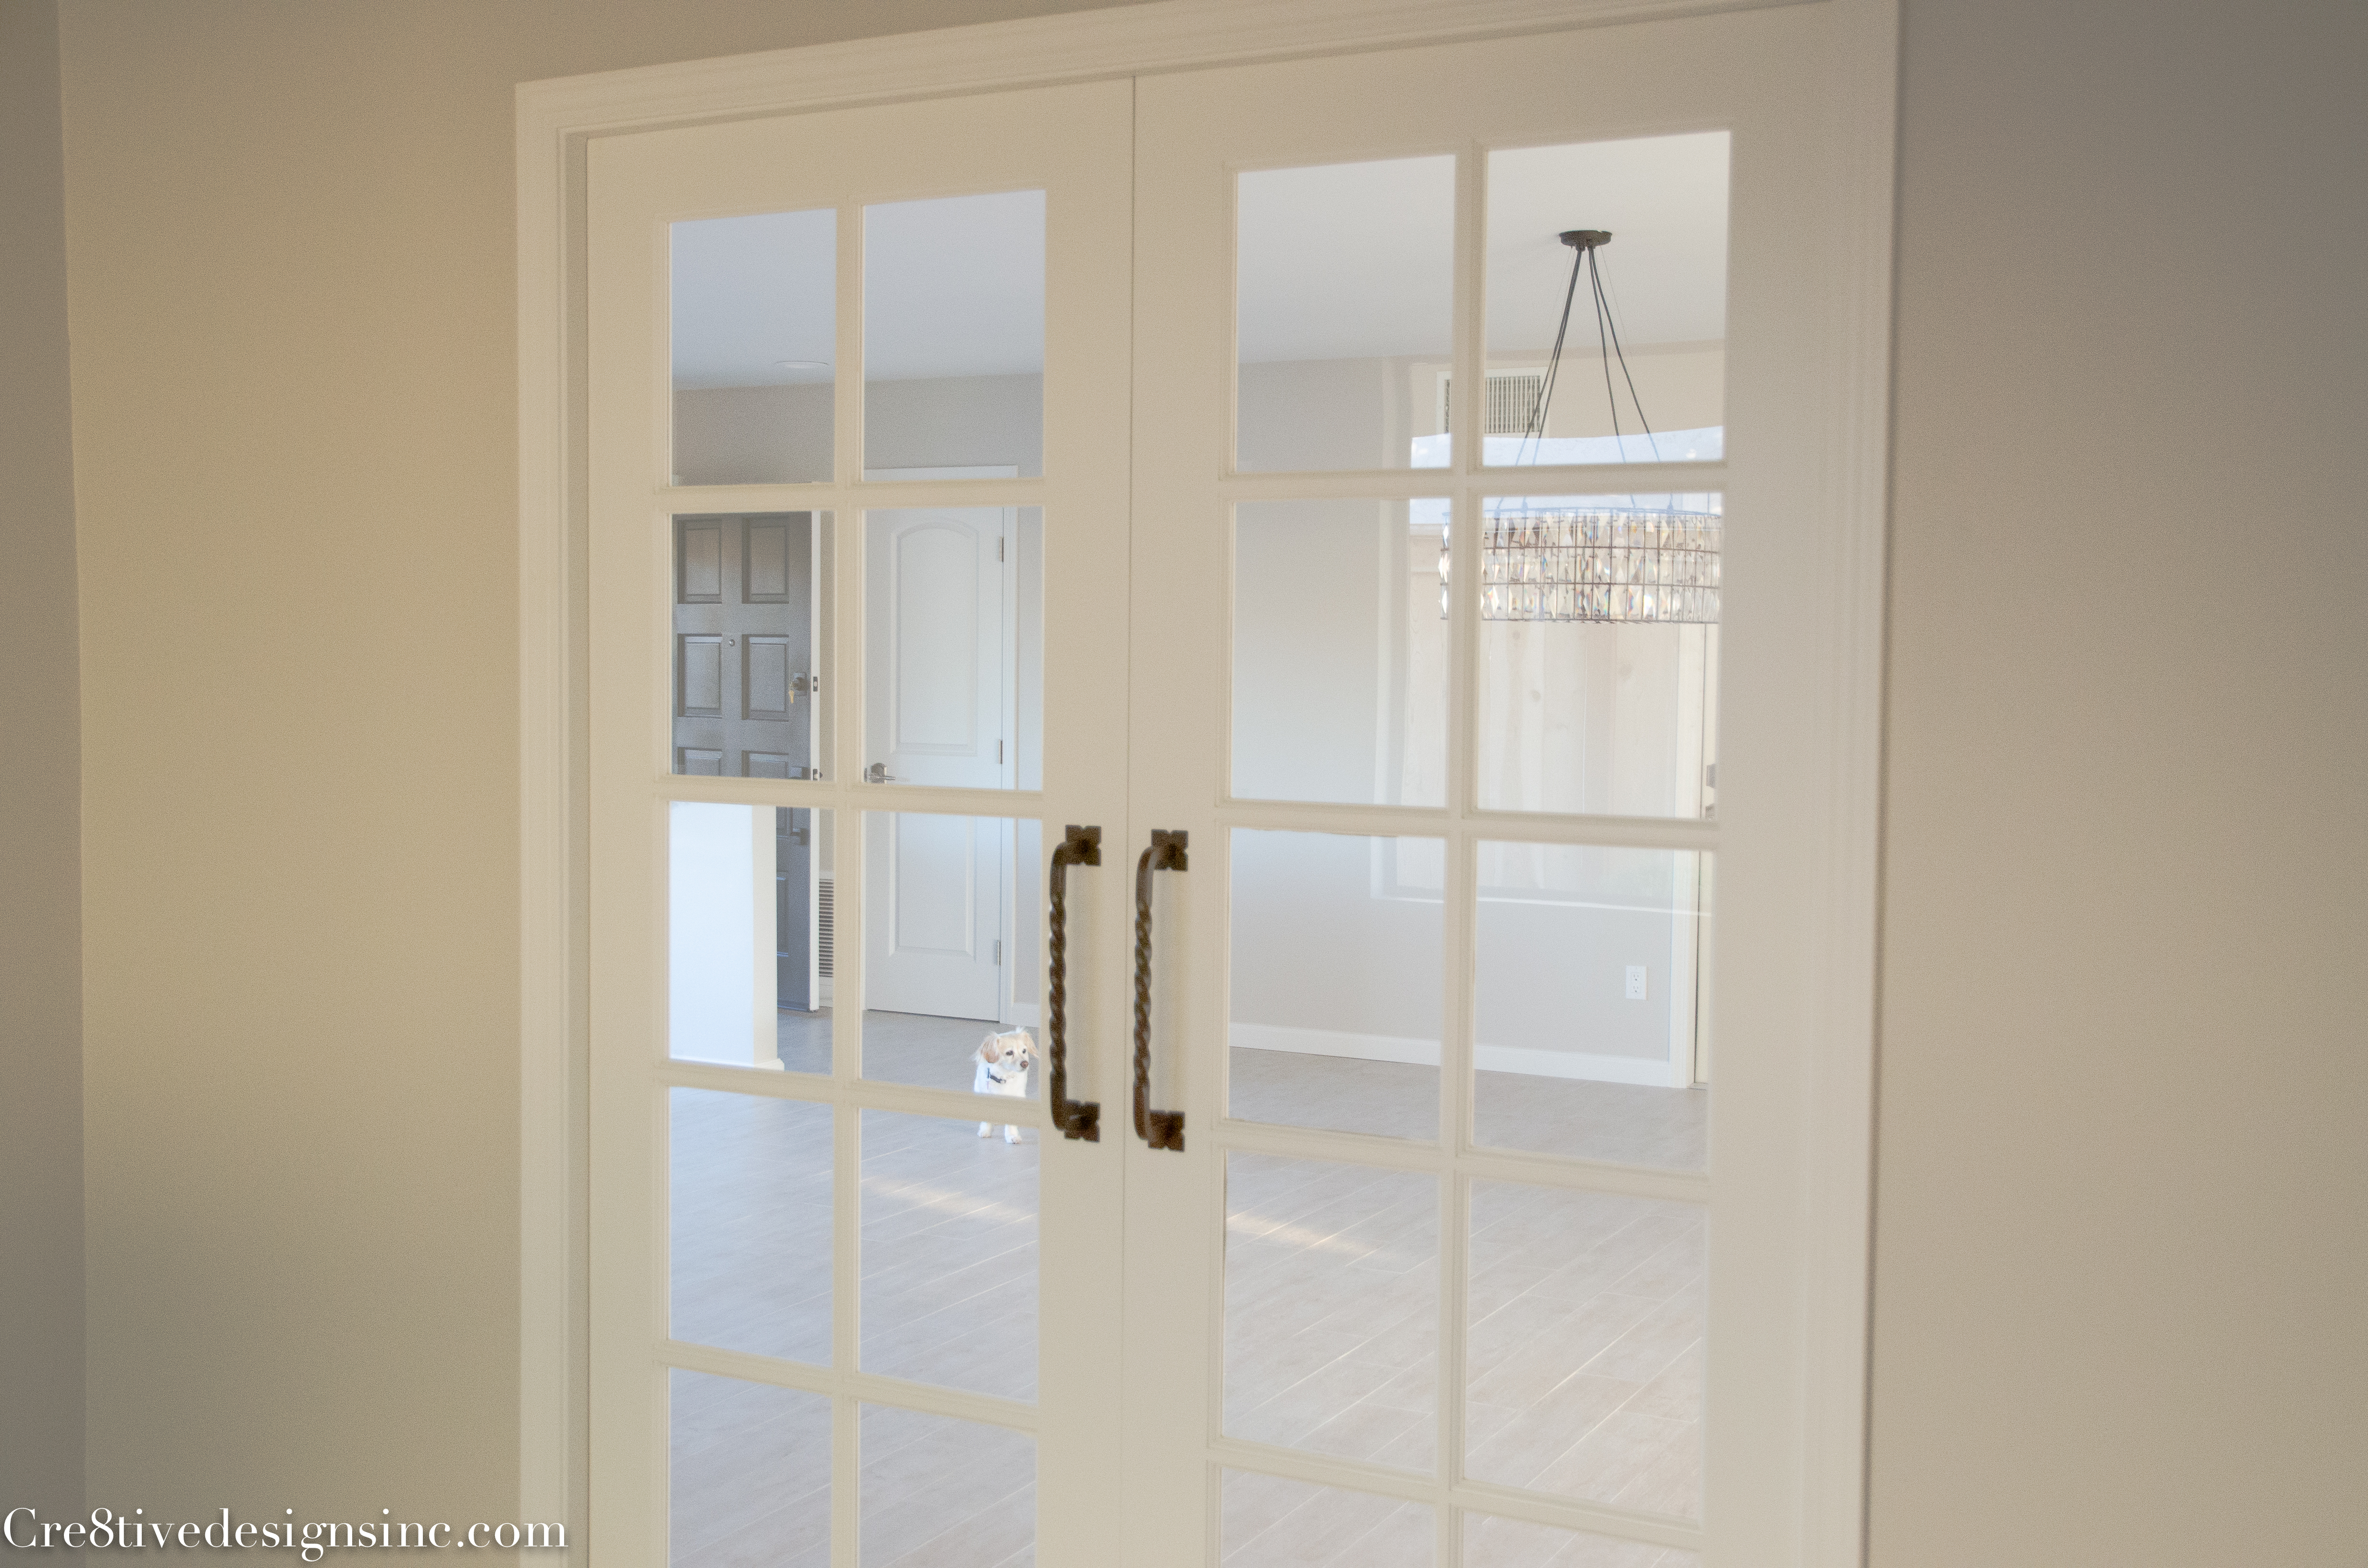
Since we took out the window in the living room and kitchen, I was afraid the rest of the house would be dark. So I used glass french doors to help bring in the light from the new office window
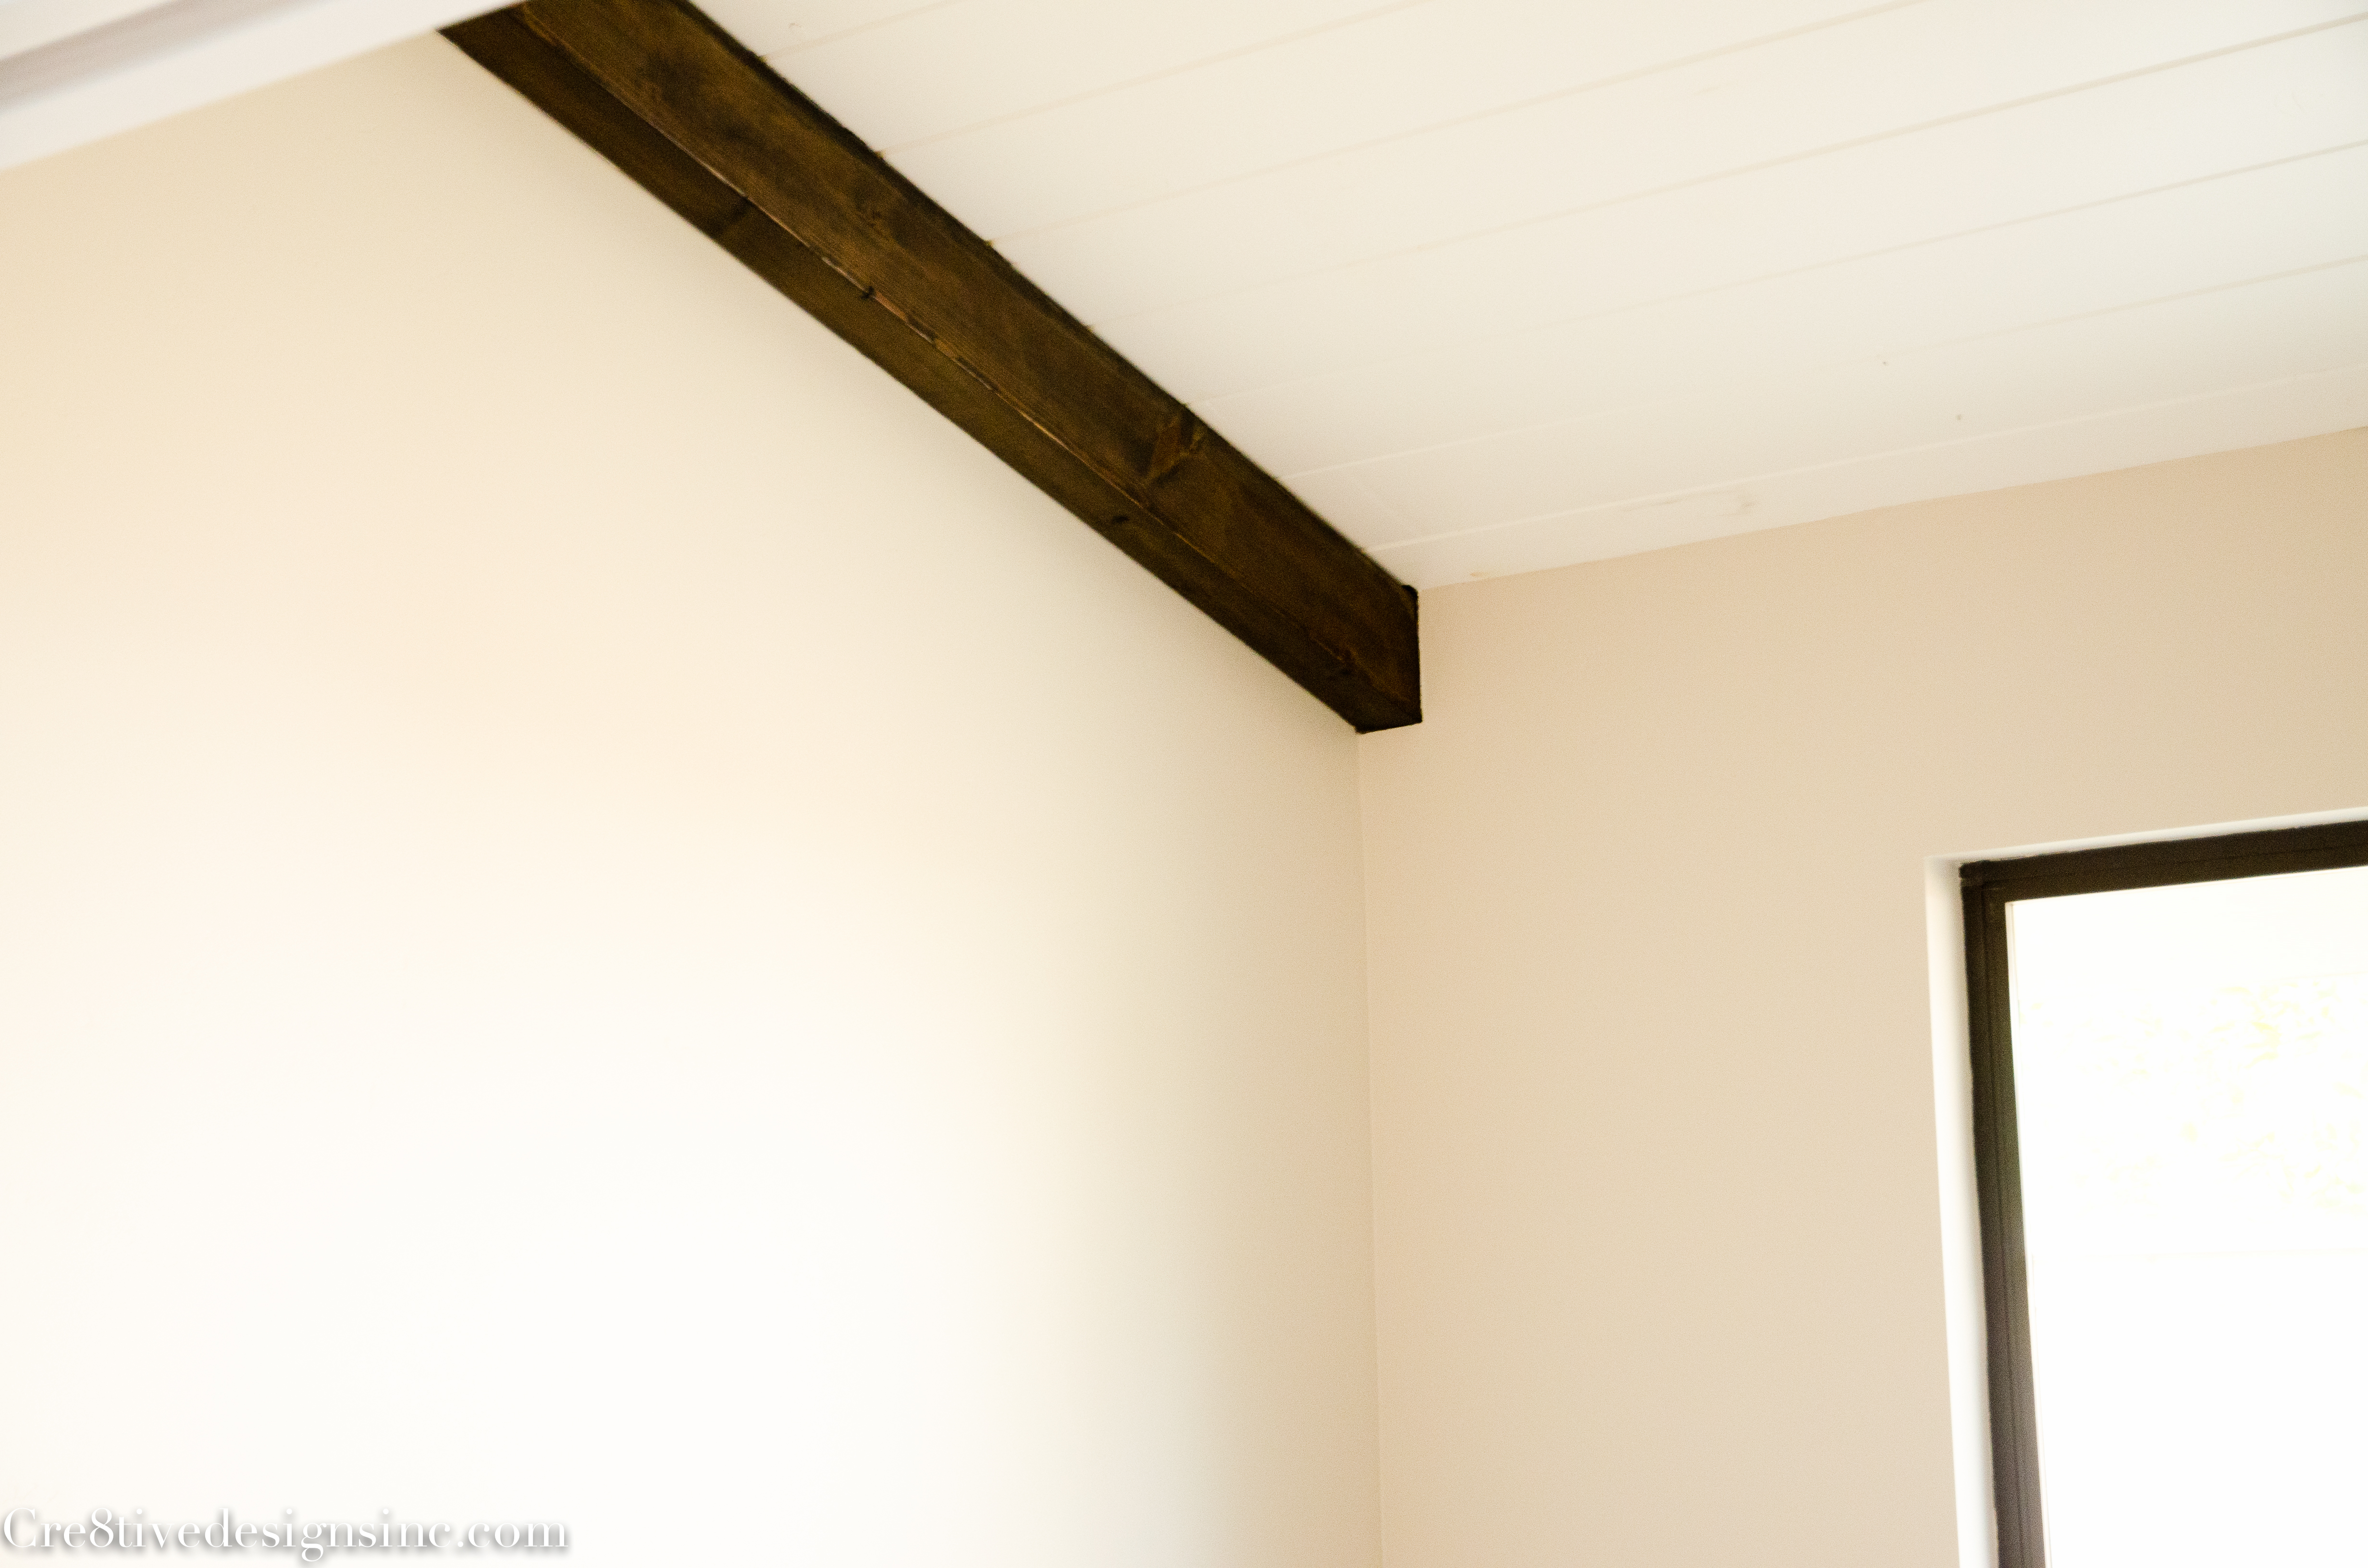
The office is only 92 square feet, so I kept the ceiling high and at a slant to give the room more of an open feeling. I added tongue and groove ceiling with wood beams

The handles for the french doors were hard to find at a reasonable price! They had to be back to back, which can get really pricey. I found these on Amazon, they weren’t my first choice, but they were in an affordable price range. Now that they are installed, I couldn’t be more happier with how nice they look.
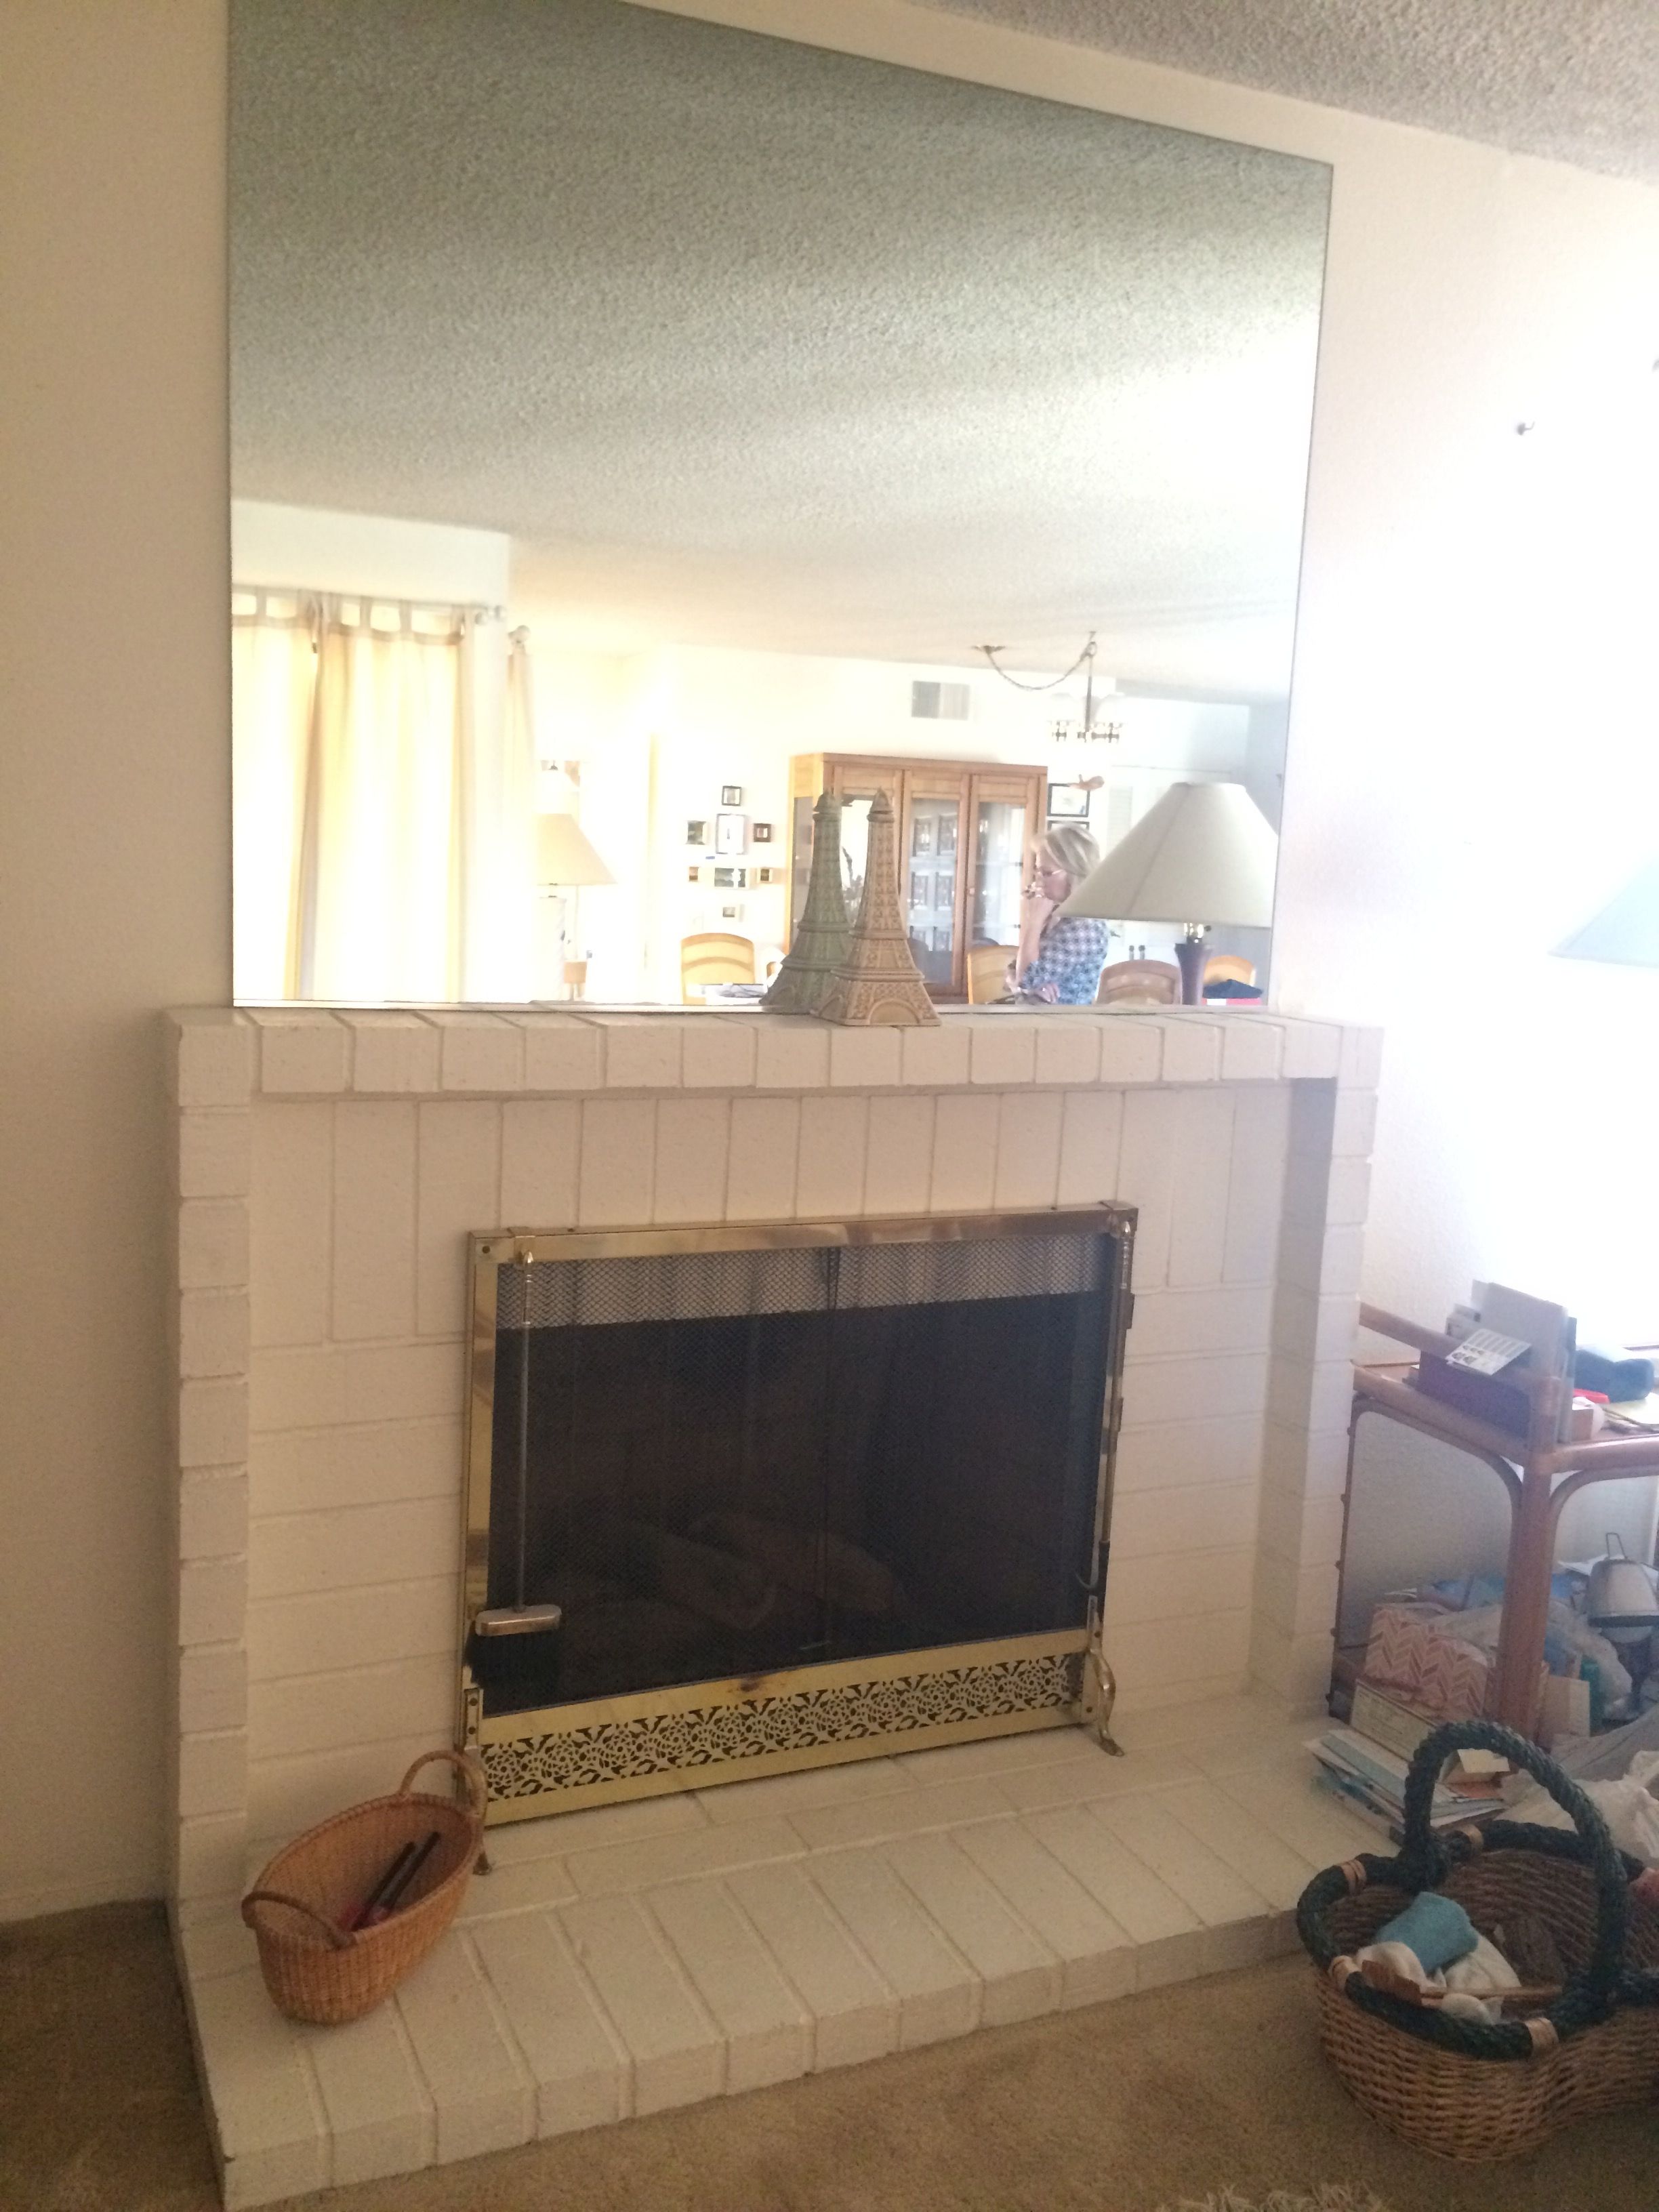
Did you notice the fireplace? Before it was just your average white painted brick with a basic mirror above it
And now with it’s new face lift

I had the electrician add a recessed electrical outlet and cable above the fireplace in case the new owners wanted to put a tv there. They could always hang artwork or a mirror to hide the plugs if they didn’t want a tv. The new tile is the bomb. It has all kinds of different linear stacked stones and metals

We chiseled out the hearth so the floor would be flush with the opening, this meets code since the flooring is porcelain. We also removed the brick on the sides that jutted out. Then we tiled the front right over the remaining existing white brick. So very little demo was involved, which is always a plus!

Outside of the brick, we beefed up the fireplace by building legs and a mantle using MDF and crown molding. There are lots of tutorial on Pinterest on how to do this. It’s a great way to update a white painted brick fireplace, without a lot of demo and budget friendly. If I get a lot of requests, I can post a step by step tutorial.
Just because it’s fun to look at before and afters, here is another shot of the before fireplace and old patio
And the after with the new fireplace update and enclosed patio turned office

My next post will be the completed transformation of the kitchen, kind of needed it don’t ya think?


wow! amazing transformation Stephanie!
(I’m so behind on catching up on my blog reading)
I love the fireplace and the living room. sooo open!
You need your own show. I’d love to see you on the small screen in action! THAT would be a great HGTV DIY show!
gail
I love the color you pick on the wall. May I know what color you use one the trim and wall? Thank u
I believe it was Alpaca and simple white from Sherwin Williams
Hi Stephanie,
I really liked the chandelier you picked out and I’m thinking about getting the same one. Do you know if it’s adjustable so that it can sit closer to the ceiling?
I got the chandelier from Pottery Barn, and they do have other options that might work.