This blog has been quiet for a while, but I thought I’d dust it off and share my latest project. I just finished a 70’s house remodel and the transformation is pretty amazing. It is what has been consuming all my time for the last 3 months. And now that it is done and on the market, I thought it was time to post some before and after pictures, and share some of the details of the transformation.
The house is a 55 and over community, like the last one I remodeled. It sits on the golf course and was in impeccable condition. But nothing had been done to it since 1977, it was time to bring it into the 2016’s.
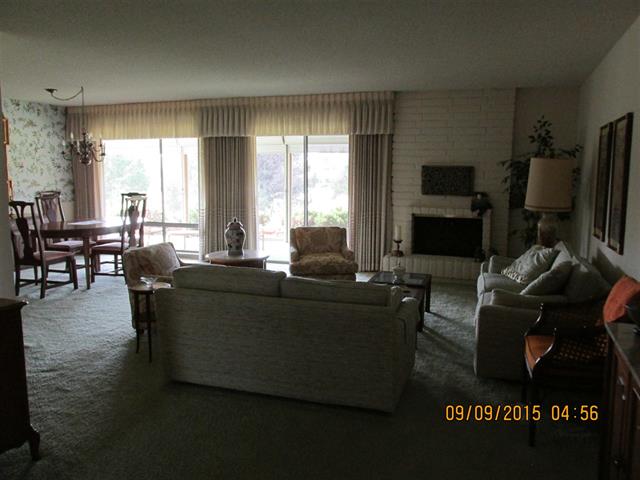
When you walked into the house, it had a dark and dated feeling. Popcorn ceilings, heavy drapes, lots and LOTS of wallpaper. I kid you not, every room had some type of wallpaper. There is a beautiful view of the golf course beyond those heavy drapes, and it wasn’t being taken advantage of at all
And this is how it looks after the remodel

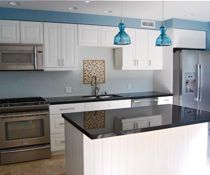
We took down the wall in between the dining room and kitchen and gave it an open living concept. Which also gave it the room a lot more light
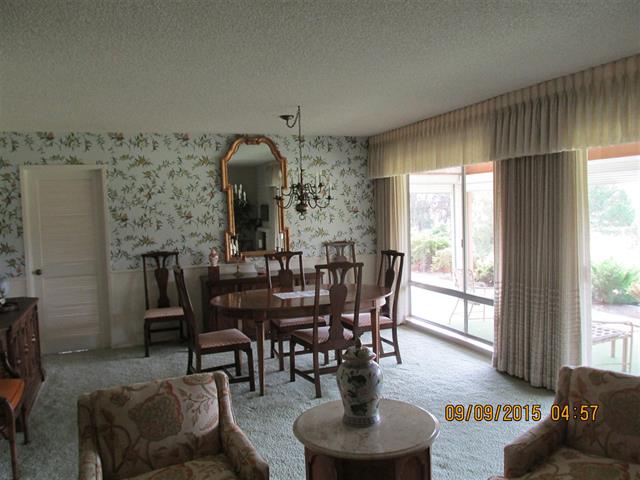
I actually really liked the wallpaper in the dining room area {that mirror got to go home with me, and now resides in my entry} There was a door into the kitchen, so 70’s right? The dining wall made the kitchen really small, and cut off the view of the golf course and the natural light from those big windows. But look at all that light pouring in now with that wall gone

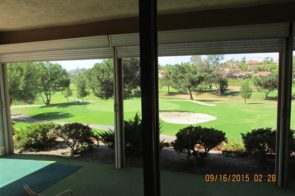
The original windows were retro fitted with energy efficient replacement windows. I loved the look and placement of the old windows, but they were single pane aluminum windows which weren’t very efficient. This is the old view looking from the dining room area

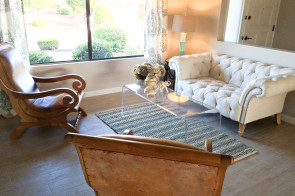
And this is what you see now. A new updated fireplace, new flooring and crown molding

The fireplace is one of my favorites. We didn’t demo the fireplace, but used the existing brick as our base. We framed the front of it with metal framing so that it would be flush for the drywall and tile. Here is a cell phone progress picture of what I am talking about

The drywall and mantel is installed at this point, but the metal framing went all the way up to the ceiling behind the drywall.
I think the tile really updates the fireplace. It is a Calcutta marble in a chevron pattern. Don’t you just love the beefiness of the fireplace mantel? Can you believe that mantle is from Pottery Barn? Yep they sell fireplace mantels. I purchased it on their Black Friday sale. It is hollow {but real wood} and hangs with a french cleat. The texture on it is a hand scraped, Love!
![]()
We kept the original fireplace screen. The hearth is a pre-fab piece of marble, which saved me some money. They run about $250 for a 9′ piece with an eased edge, the installation of the pre-fab was $150. A slab would have been at least double that, plus the fabrication and installation.
![]()
The color on the walls is Sherwin Williams Alpca. It is a very neutral grey, my go to color for sure. I used a porcelain wood plank floor throughout the whole house.

Taking out the heavy drapes in the living room really made a huge difference. Sometimes, less is more. With the wall gone, adding new flooring, paint, crown molding and a fireplace makeover it is now a more open, inviting and entertaining space. I’ll take you through the kitchen make over next post. You won’t believe the before…so 70’s


Beautiful job Stephanie. I love the new, updated look. I can’t wait to see all the details about the kitchen.
gail
Thanks Gail!
Absolutely beautiful! I just bought my dream (fixer upper) house in Rancho Bernardo recently and would love to do exactly what you did. Do you mind telling me where you got the pre-fab stone? Thanks!
I used Rainbow Stone. But I wouldn’t recommend them lol. I would go with Tosca instead. Their prices are better and their customer service is much nicer.
Great job. I really like the new updated look. Thanks for sharing.